Shell access via ADB#
Du kannst Dein UBports-Gerät in den Entwicklermodus versetzen und vom Desktop-PC auf eine Bash-Shell zugreifen.
ADB-Installation#
Zuerst muss ADB auf dem PC installiert werden.
Unter Ubuntu:
sudo apt install android-tools-adb
Unter Fedora:
sudo dnf install android-tools
And on macOS with Homebrew:
brew install android-platform-tools
Für Windows hier nur die command-line-tools herunterladen.
Aktiviere den Entwicklermodus#
Als Nächstes ist es nötig, den Entwicklermodus zu aktivieren.
Gerät in den Entwicklermodus versetzen (Systemeinstellungen - Über - Entwicklermodus - Auswahlfeld aktivieren)
Gerät neustarten
Plug the device into a computer with ADB installed
Konsole öffnen und
adb devicesausführen.
Bemerkung
Wenn die Shell nicht mehr verwendet wird, sollte der Entwicklermodus wieder deaktiviert werden.
If there’s a device in the list here (The command doesn’t print „List of devices attached“ and a blank line), you are able to use ADB. If not, continue to the next section.
Authorize access to the device#
When using adb for the first time on a computer, the following dialog will appear when you unlock the screen.
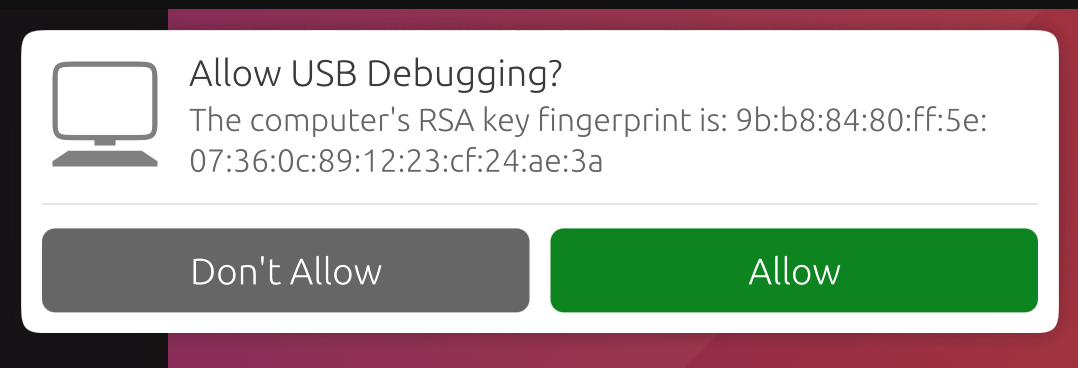
This ensures that ADB commands will not work on a new computer unless user unlock the phone and acknowledge the dialog. Selecting „Allow“ will make the ADB commands work for this session, and will also remember this computer so that it won’t prompt you again in the future.
Bemerkung
If you’re bringing up a port and you require ADB access before the UI is available, you can disable this protection by editing /etc/default/adbd and change ADBD_SECURE=1 to ADBD_SECURE=0.
Frequently used ADB commands#
ADB shell commands:
adb shell — Gives you access to the Linux command-line shell on your device.
adb shell [command] — Runs the specified shell command on your device.
Zusätzliche Adb Kommandos:
adb push [source] [destination] — Pushes a file from your computer to your device.
adb pull [destination] [source] — Pulls a file from your device to your computer.
For more ADB commands, refer to the official documentation.
Hinzufügen von Hardware-IDs#
ADB erkennt nicht immer die Geräte am PC, die angesprochen werden sollen. Du kannst Geräte, die nicht erkannt werden konnten, manuell hinzufügen.
Einfach den Befehl für das ausgewählte Gerät ausführen, falls es in der folgenden Liste aufgeführt ist. Nach dem Befehl adb kill-server kann dann der ursprünglich gewünschte Befehl ausgeführt werden.
Fairphone 2:
printf "0x2ae5 \n" >> ~/.android/adb_usb.ini
OnePlus One:
printf "0x9d17 \n" >> ~/.android/adb_usb.ini